Apache Kafka is an open-source distributed event streaming platform. The project was initiated by LinkedIn in 2010 and is available to the public since 2011. It was made to handle high volumes of real-time data streams reliably and efficiently. This makes it a popular choice for building scalable and fault-tolerant data pipelines and streaming applications. Like for instance Netflix, Uber, and PayPal.
Kafka operates on a publish-subscribe model. Producers publish messages to topics, and consumers subscribe to those topics to consume the messages. The messages are organized into ordered, immutable logs which makes it fault-tolerant.
Apache Kafka provides client libraries in various programming languages, making it easier for developers to interact with Kafka clusters and build applications that can produce or consume messages. In this tutorial, we’ll use the Confluent.Kafka NuGet package to produce and consume messages using C#. If you want to see code example in difféeretns languages, you can check the code examples from Kafka.
Pre-requisites
- .NET 6 or above
- An IDE like Visual Studio, Visual Studio Code or Rider
- A Confluent Cloud account or Docker if you want to run your cluster locally.
1. Create a Kafka cluster and create a topic
Using Conlfuent Cloud
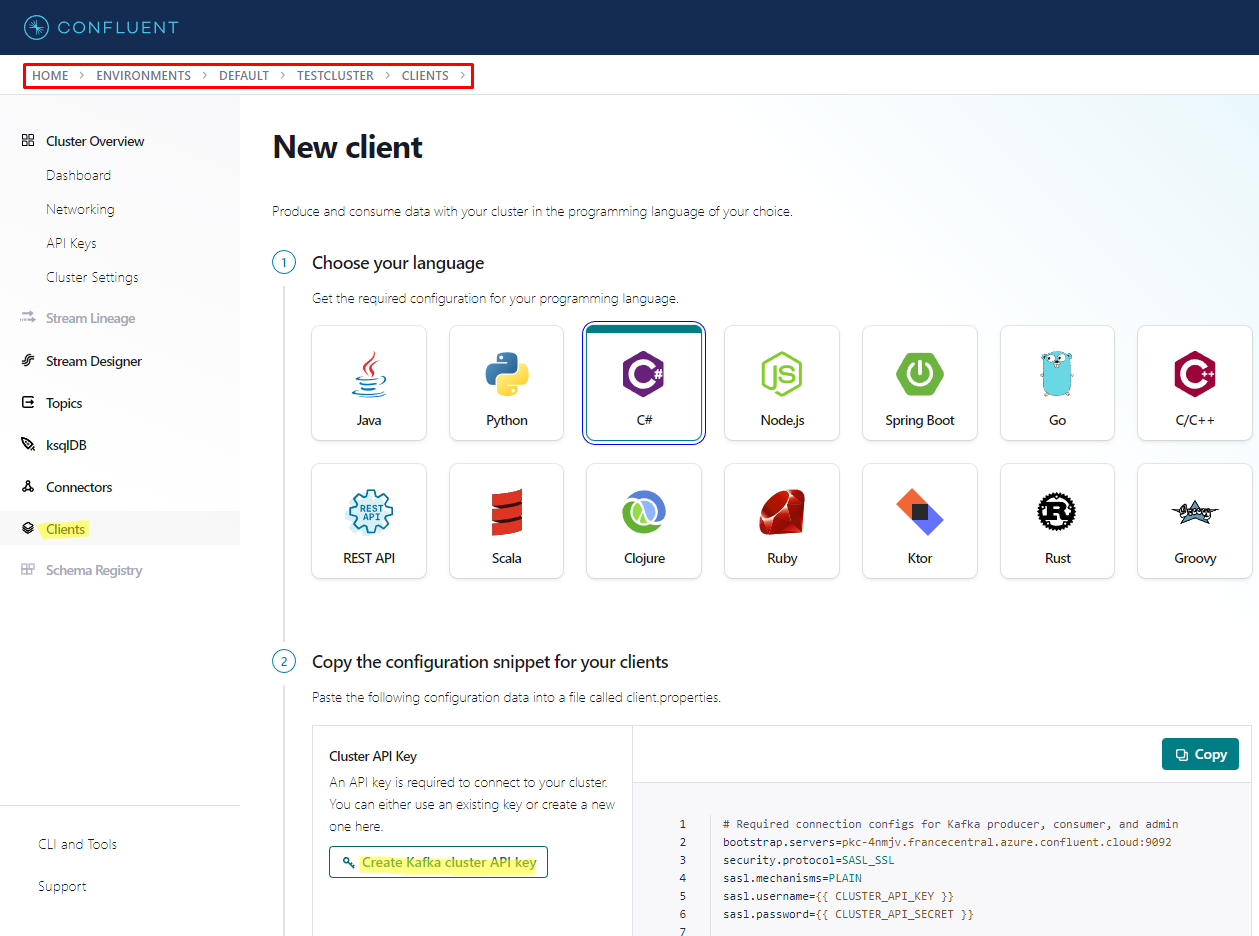
Once you have created your Confluent Cloud account, you should see a personalized quickstart that will guide you through the process of creating an environment and a cluster. Once done, get your API Credentials by doing the following:
-
Open the Cluster menu and click Clients.
-
Click New client to open the New Client page.
-
Click the C# button.
-
Click Create Kafka cluster API key
-
Save the API key and secret as well as the bootstrap servers. You will need them later.
-
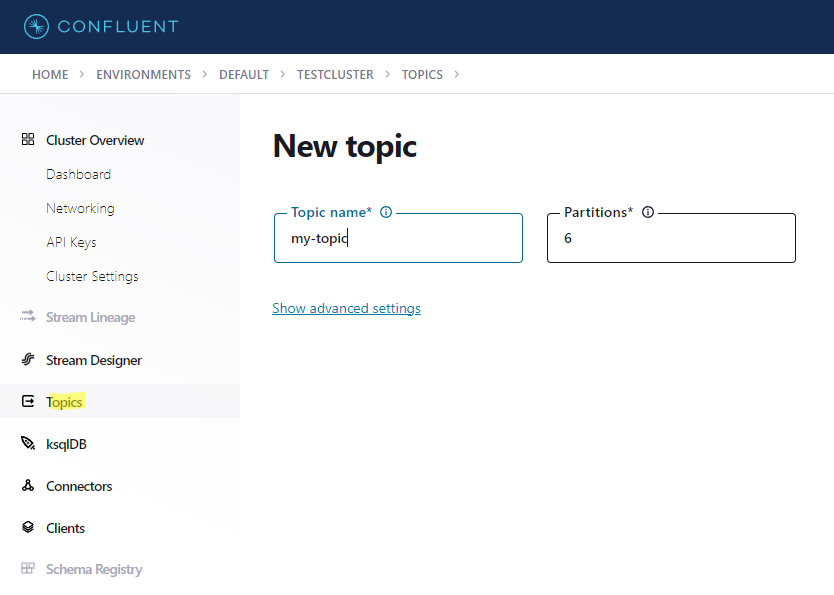
Click Topics, then Add topic.
You can also do this using a CLI, check this quickstart.
Using Docker
Create this docker-compose.yml file:
---
version: '3.4'
services:
    zookeeper:
        image: confluentinc/cp-zookeeper:latest
        hostname: zookeeper
        container_name: zookeeper
        ports:
            - '2181:2181'
        environment:
        ZOOKEEPER_CLIENT_PORT: 2181
        ZOOKEEPER_TICK_TIME: 2000
    broker:
        image: confluentinc/cp-server
        hostname: broker
        container_name: broker
        depends_on:
            - zookeeper
        ports:
            - '9092:9092'
        environment:
            KAFKA_BROKER_ID: 1
            KAFKA_ZOOKEEPER_CONNECT: 'zookeeper:2181'
            KAFKA_LISTENER_SECURITY_PROTOCOL_MAP: PLAINTEXT:PLAINTEXT,PLAINTEXT_HOST:PLAINTEXT
            KAFKA_ADVERTISED_LISTENERS: PLAINTEXT://broker:29092,PLAINTEXT_HOST://localhost:9092
            KAFKA_OFFSETS_TOPIC_REPLICATION_FACTOR: 1
            KAFKA_GROUP_INITIAL_REBALANCE_DELAY_MS: 0
            KAFKA_CONFLUENT_LICENSE_TOPIC_REPLICATION_FACTOR: 1
            CONFLUENT_SUPPORT_CUSTOMER_ID: 'anonymous'
The bootstrap server adress will be localhost:9092.
To run the cluster, open a terminal and run the following command:
docker-compose up -d
To create a topic, run the following command:
docker exec broker
  kafka-topics --bootstrap-server broker:9092 \
      --create \
      --topic my-topic
Here’s this command explaination:
docker exec broker: Execute a command inside the running Docker container “broker”.kafka-topics: The command-line tool for managing topics.--bootstrap-server broker:9092: Specifies the address and port of the Kafka broker to connect to.--create: Create a new topic.--topic my-topic: Specifies the name of the topic to be created: “my-topic”.
If you want to know more about setting up Kafka using Docker, you can check this quickstart.
2. Create a new .NET console application
Open your IDE and create a new .NET console application or use the dotnet CLI:
dotnet new console --name KafkaLearning
3. Add the Confluent.Kafka NuGet package
Add the Confluent.Kafka NuGet package to your project using your IDE or the dotnet CLI:
dotnet add package Confluent.Kafka
4. Create a ClientConfig
var clientConfig = new ClientConfig
{
  BootstrapServers = "<your boostrap server>",
  // You don't need to code below if you are not using Confluent Cloud
  SecurityProtocol = SecurityProtocol.SaslSsl,
  SaslMechanism = SaslMechanism.Plain,
  SaslUsername = "<your api key>",
  SaslPassword = "<your api secret>",
};
5. Create a Producer
async Task ProduceMessage()
{
  using var producer = new ProducerBuilder<Null, string>(clientConfig).Build();

  Console.Write("Enter you message to send: ");

  var userInput = Console.ReadLine() ?? "";
  var message = new Message<Null, string>
  {
    Value = userInput
  };

  var deliveryResult = await producer.ProduceAsync("my-topic", message);

  Console.WriteLine($"Message delivered to {deliveryResult.TopicPartitionOffset}");
}
6. Create a Consumer
void ConsumeMessage()
{
  var consumerConfig = new ConsumerConfig(clientConfig)
  {
    // The groupId is required to consume data from topics
    GroupId = "pirlouit.dev",
    // The offset to start reading from
    AutoOffsetReset = AutoOffsetReset.Earliest,
    // Disbale committing offsets.
    EnableAutoCommit = false
  };

  // Enable canceling with Ctrl+C.
  CancellationTokenSource cts = new();
  Console.CancelKeyPress += (_, e) =>
  {
    e.Cancel = true; // prevent the process from terminating
    cts.Cancel();
  };

  using var consumer = new ConsumerBuilder<Ignore, string>(consumerConfig).Build();

  consumer.Subscribe("my-topic");

  try
  {
    while (true)
    {
    var consumeResult = consumer.Consume(cts.Token);
    Console.WriteLine($"Message received: {consumeResult.Message.Value}");
    }
  }
  catch (OperationCanceledException)
  {
    // The consumer was stopped via cancellation token.
    Console.WriteLine($"Exiting...");
  }
  finally
  {
    consumer.Close();
  }
  Console.ReadLine();
}
7. Produce messages
Add the following code a the end of your Program.cs file:
while (true)
  await ProduceMessage();

ConsumeMessage();
You should have this file:
using Confluent.Kafka;

var clientConfig = new ClientConfig
{
  BootstrapServers = "<your boostrap server>",
  // You don't need to code below if you are not using Confluent Cloud
  SecurityProtocol = SecurityProtocol.SaslSsl,
  SaslMechanism = SaslMechanism.Plain,
  SaslUsername = "<your api key>",
  SaslPassword = "<your api secret>",
};

async Task ProduceMessage()
{
  using var producer = new ProducerBuilder<Null, string>(clientConfig).Build();

  Console.Write("Enter you message to send: ");

  var userInput = Console.ReadLine() ?? "";
  var message = new Message<Null, string>
  {
    Value = userInput
  };

  var deliveryResult = await producer.ProduceAsync("my-topic", message);

  Console.WriteLine($"Message delivered to {deliveryResult.TopicPartitionOffset}");
}

void ConsumeMessage()
{
  var consumerConfig = new ConsumerConfig(clientConfig)
  {
    // The groupId is required to consume data from topics
    GroupId = "pirlouit.dev",
    // The offset to start reading from if there are no committed offsets (or there was an error in retrieving offsets).
    AutoOffsetReset = AutoOffsetReset.Earliest,
    // Do not commit offsets.
    EnableAutoCommit = false
  };

  // Enable canceling with Ctrl+C.
  CancellationTokenSource cts = new();
  Console.CancelKeyPress += (_, e) =>
  {
    e.Cancel = true; // prevent the process from terminating.
    cts.Cancel();
  };

  using var consumer = new ConsumerBuilder<Ignore, string>(consumerConfig).Build();

  consumer.Subscribe("my-topic");

  try
  {
    while (true)
    {
    var consumeResult = consumer.Consume(cts.Token);
    Console.WriteLine($"Message received from {consumeResult.TopicPartitionOffset}: {consumeResult.Message.Value}");
    }
  }
  catch (OperationCanceledException)
  {
    // The consumer was stopped via cancellation token.
    Console.WriteLine($"Exiting...");
  }
  finally
  {
    consumer.Close();
  }
  Console.ReadLine();
}

while (true)
  await ProduceMessage();

ConsumeMessage();
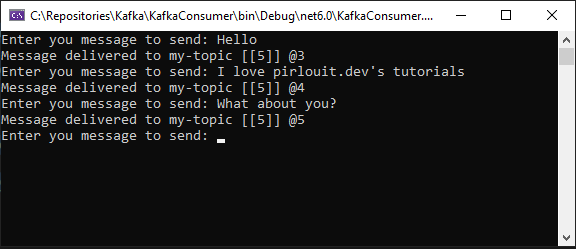
Run the application to produce messages
dotnet run
You can now tap messages and press enter to send them to the topic.
8. Consume messages
Comment the code below in order to consume the messages:
//while (true)
//  await ProduceMessage();

ConsumeMessage();
Run the application again to consume the messages
dotnet run
You should see the messages you sent to the topic.
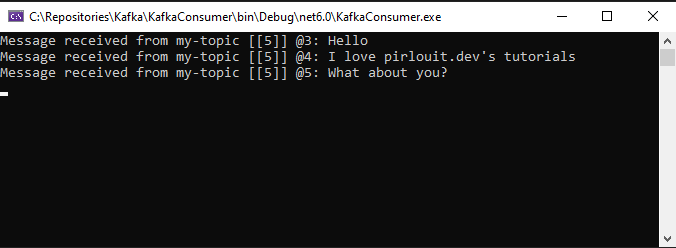
Congratulations! You have successfully produced and consumed Kafka messages using C#.
Going further
This application was very easy te create but it’s not very useful. In the next tutorial, we’ll see how to create a more useful application that will aggregate messages. We will create an application that consumes existing streams to send them to a Kafka topic and then editing the data using ksqlDB query.